Step-by-Step Guide to Automated Data Augmentation for Beginners
Dohessiekan Xavier Gnondoyi
Student at the African Leadership University in Software Engineering, Cloudoor
Introduction (With Image)
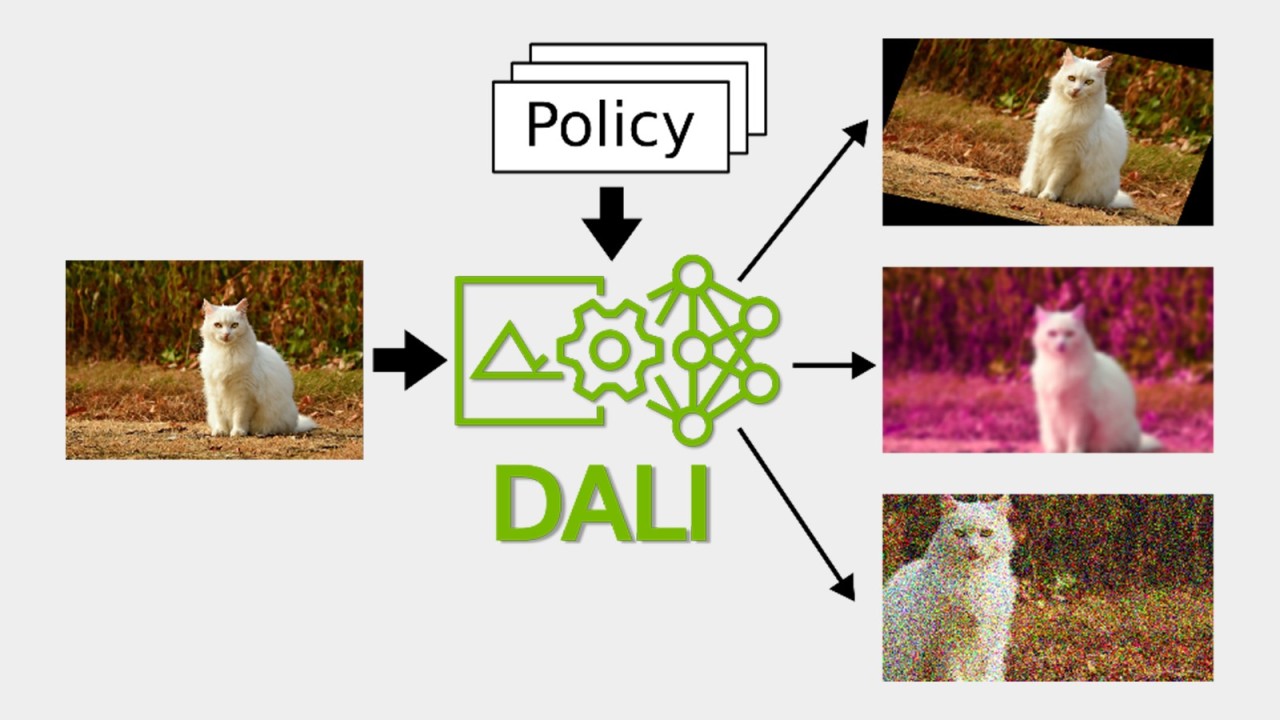
Example Image: A simple image collage showing examples of augmented data (e.g., rotated, scaled, flipped images) in a grid to visually illustrate transformations.
In machine learning, especially when working with images, having a vast amount of data is essential for building accurate and reliable models. However, collecting large datasets can be challenging. Data augmentation offers a way to artificially increase your dataset by creating new data points from your existing data. This guide will show you how to perform automated data augmentation in a few straightforward steps, even if you’re new to machine learning.
Step 1: Understanding Data Augmentation
Data augmentation involves creating new data by slightly altering the existing data without changing its label or meaning. In image processing, for instance, you might rotate, flip, or crop an image to create variations. This helps the model generalize better by learning from a broader array of scenarios.
Step 2: Setting Up the Environment
To get started with data augmentation, you’ll need a few key libraries in Python:
Install the libraries using pip if they’re not already in your environment:(But here I am not going to show the code I don't want to give you stress).
Step 3: Basic Augmentations with Pillow
Let’s start with some simple augmentations using the Pillow library:
Example:
from PIL import Image, ImageEnhance
import matplotlib.pyplot as plt
# Open an image file
image = Image.open('sample_image.jpg')
# Apply rotation
rotated_image = image.rotate(45) # Rotate the image by 45 degrees
# Display the original and augmented images
plt.subplot(1, 2, 1)
plt.imshow(image)
plt.title("Original")
plt.subplot(1, 2, 2)
plt.imshow(rotated_image)
plt.title("Rotated")
plt.show()
Step 4: Advanced Augmentations with Albumentations
For more complex transformations, Albumentations is a powerful tool. It allows chaining multiple augmentations, which can be applied at random with specific probability settings.
Example: here some code to make you understands well:
import albumentations as A
from PIL import Image
import numpy as np
# Define an augmentation pipeline
transform = A.Compose([
A.HorizontalFlip(p=0.5), # Flip horizontally with a probability of 50%
A.Rotate(limit=30, p=0.5), # Rotate up to 30 degrees with a probability of 50%
A.RandomBrightnessContrast(p=0.5) # Adjust brightness and contrast with a probability of 50%
])
# Load the image and convert it to a numpy array
image = Image.open('sample_image.jpg')
image_np = np.array(image)
# Apply transformations
augmented_image = transform(image=image_np)['image']
# Display the augmented image
plt.imshow(augmented_image)
plt.title("Augmented Image")
plt.show()
Step 5: Automating with TensorFlow's ImageDataGenerator
For TensorFlow/Keras users, ImageDataGenerator is a built-in tool that makes data augmentation easier to integrate during model training.
Example: You can see the example here:
from tensorflow.keras.preprocessing.image import ImageDataGenerator
# Initialize ImageDataGenerator with augmentations
datagen = ImageDataGenerator(
rotation_range=40,
width_shift_range=0.2,
height_shift_range=0.2,
shear_range=0.2,
zoom_range=0.2,
horizontal_flip=True,
fill_mode='nearest'
)
# Load an image and reshape it
image = np.expand_dims(image_np, axis=0) # Add an extra dimension
# Generate augmented images
augmented_images = [datagen.flow(image, batch_size=1) for _ in range(5)]
# Display augmented images
for i, batch in enumerate(augmented_images):
aug_image = batch[0].astype(np.uint8)
plt.subplot(1, 5, i+1)
plt.imshow(aug_image)
plt.axis('off')
plt.show()
Step 6: Applying Data Augmentation During Model Training
Data augmentation becomes even more powerful when applied in real-time during model training. For example, with Keras, you can pass the datagen.flow object to model.fit():
Example:
# Doing with a Keras model named 'model'
model.fit(datagen.flow(x_train, y_train, batch_size=32), epochs=10)
Conclusion: Why Data Augmentation Matters
Automated data augmentation allows your model to learn from a greater diversity of data without needing a larger dataset. This can improve model performance, reduce overfitting, and allow it to generalize better to unseen data. By following these steps, you’ve taken a significant stride toward enhancing your machine learning projects.
Tech Resource Optimization Specialist | Enhancing Efficiency for Startups
4 个月Great guide on data augmentation! These practical steps make it easy to boost dataset diversity and improve model performance.