Solving Common Gradle Issues in Flutter Android Builds
Building Android apps with Flutter is usually a smooth process, but occasionally, Gradle issues can pop up and cause frustration. If you’ve ever encountered errors related to Gradle while working on your Flutter project, this article will guide you through solving some of the most common problems.
1. Gradle Sync Failed: Could not find method android()
Cause: This issue usually occurs when there’s a mismatch between the Gradle plugin and the Android SDK version.
Solution:
dependencies {
    classpath 'com.android.tools.build:gradle:7.0.4'
}
2. MultiDex Disabled Error
Cause: When the number of methods in your app exceeds the 64K limit, and MultiDex is not enabled, you’ll encounter a build failure.
Solution:
android {
    defaultConfig {
        multiDexEnabled true
    }
}
dependencies {
    implementation 'androidx.multidex:multidex:2.0.1'
}
3. Method Limit Exceeded
Cause: When your app's method count exceeds the 64K method limit, you might encounter this issue even if MultiDex is enabled.
Solution:
android {
    buildTypes {
        release {
            minifyEnabled true
            proguardFiles getDefaultProguardFile('proguard-android-optimize.txt'), 'proguard-rules.pro'
        }
    }
}
4. Class Not Found Errors Due to MultiDex
Cause: Sometimes, after enabling MultiDex, you might still encounter java.lang.NoClassDefFoundError or ClassNotFoundException errors.
Solution:
@Override
protected void attachBaseContext(Context base) {
    super.attachBaseContext(base);
    MultiDex.install(this);
}
5. Slow Flutter Builds Due to MultiDex
Cause: Enabling MultiDex can sometimes slow down your Flutter build process, particularly during development.
Solution:
org.gradle.daemon=true
org.gradle.parallel=true
org.gradle.configureondemand=true
android.useAndroidX=true
android.enableJetifier=true
android {
    buildTypes {
        release {
            minifyEnabled true
            proguardFiles getDefaultProguardFile('proguard-android-optimize.txt'), 'proguard-rules.pro'
        }
    }
}
6. Gradle Daemon Out of Memory
Cause: The Gradle daemon runs out of memory when building large projects, leading to OutOfMemoryError.
Solution:
org.gradle.jvmargs=-Xmx1536m
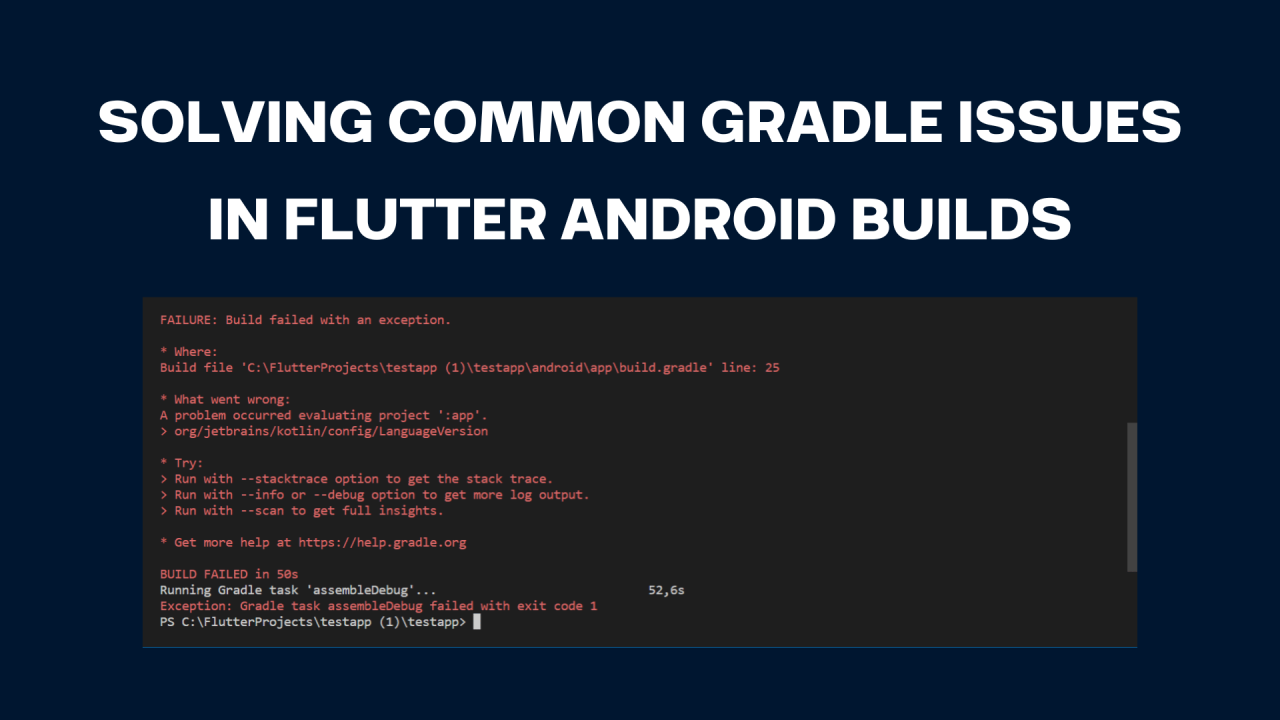
7. Execution failed for task ':app
Cause: This error typically occurs due to a Kotlin version mismatch between your Flutter project and the dependencies.
Solution:
领英推荐
ext.kotlin_version = '1.7.10'
Note: In a Flutter project, you might not find the ext.kotlin_version declaration in the android/build.gradle file. Instead, you should look for it in the settings.gradle file.
plugins {
    id "org.jetbrains.kotlin.android" version "2.0.20" apply false
}
8. Failed to Download Dependencies
Cause: Sometimes, Gradle fails to download dependencies due to network issues, outdated repositories, or a corrupt Gradle cache.
Solution:
For MacOS/Linux
rm -rf ~/.gradle/caches/
For Windows
rd /s /q "%USERPROFILE%\.gradle\caches"
repositories {
    google()
    mavenCentral()
    jcenter() // Only if needed, as it's deprecated
}
9. Unsupported Gradle Version Error
Cause: This error typically occurs when your Gradle version is either too old or too new for the version of the Android Gradle plugin you’re using.
Solution:
distributionUrl=https\://services.gradle.org/distributions/gradle-7.2-all.zip
10. Invalid Cache Key for Task Execution
Cause: This occurs due to corrupted Gradle caches or issues with incremental builds.
Solution:
flutter clean
For MacOS/Linux
rm -rf ~/.gradle
For Windows
rd /s /q "%USERPROFILE%\.gradle"
11. Gradle Build Stuck at “Resolving Dependencies”
Cause: This happens due to slow network connections or dependency conflicts.
Solution:
configurations.all {
    resolutionStrategy {
        force 'com.android.support:support-v4:27.1.1'
    }
}
org.gradle.parallel=false
Conclusion
Gradle issues can be daunting, but with the right approach, they can be resolved quickly. By ensuring that your Gradle and Kotlin versions are compatible, cleaning and rebuilding your project, and keeping dependencies up to date, you can prevent many of these common problems. Remember to keep your environment as clean and consistent as possible, and always double-check version compatibilities.
Having a good understanding of Gradle can save you a lot of time and headaches when working on your Flutter projects. Happy coding!
Application Developer with expertise in Flutter App Development
6 个月Great its helpful material
Founder & CEO at DevZoic | AI Solutions Leader | Expert in AI Chatbots, Web & Mobile Development, Custom AI & NLP Services
6 个月Great article! Gradle issues can be a real headache, especially when you're deep into a project. Having a go-to guide like this is invaluable for streamlining Flutter Android builds. Thanks for sharing these solutions!