Day 81 - Automating Web Application Deployment with Jenkins
Amit Sharma
Aspiring DevOps Engineer | Proficient in Docker, Kubernetes, Jenkins, Terraform, Git-GitHub | Deep Learning Enthusiast | Openshift & AWS Cloud Enthusiast | Coding in Python & C++ |
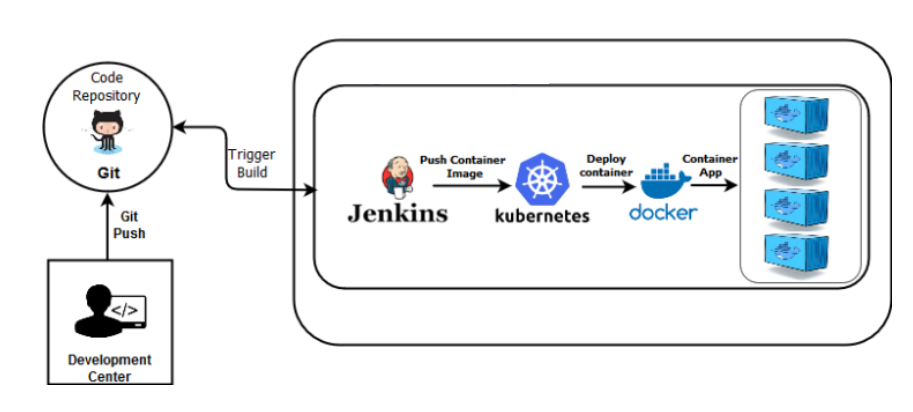
In the fast-paced world of software development, efficient and reliable deployment processes are crucial. Continuous Integration/Continuous Deployment (CI/CD) tools like Jenkins play a pivotal role in automating these processes. In this hands-on project, we will explore the power of Jenkins and its declarative syntax to automate the deployment of a web application.
Setting the Stage
Overview of the Project
Our goal is to create a Jenkins pipeline that automates the deployment process of a web application. The pipeline will include various stages such as building, testing, deploying to a staging environment, running acceptance tests, and deploying to production if all tests pass.
Prerequisites
Before diving into the hands-on project, ensure you have the following:
Hands-On Project
Step 1: Set Up Jenkins
Step 2: Define the Declarative Pipeline
In Jenkins, pipelines are defined using a domain-specific language, and the declarative syntax provides a clean and structured way to define your pipeline. Create a Jenkinsfile in the root of your web application project with the pipeline stages.
pipeline {
    agent any

    stages {
        stage('Build') {
            steps {
                // Build your web application
            }
        }

        stage('Test') {
            steps {
                // Run tests on your application
            }
        }

        stage('Deploy to Staging') {
            steps {
                // Deploy to a staging environment
            }
        }

        stage('Acceptance Tests') {
            steps {
                // Run acceptance tests
            }
        }

        stage('Deploy to Production') {
            when {
                expression { currentBuild.resultIsBetterOrEqualTo('SUCCESS') }
            }
            steps {
                // Deploy to production if all tests pass
            }
        }
    }
}
Step 3: Configure Jenkins Pipeline
Step 4: Run the Pipeline
Step 5: Monitor and Troubleshoot
Conclusion
Congratulations! You've successfully automated the deployment process of your web application using Jenkins and its declarative syntax. This hands-on project not only enhances your understanding of CI/CD concepts but also equips you with practical skills that are highly valuable in real-world software development scenarios. Happy learning, and keep automating!
I'm confident that this article will prove to be valuable, helping you discover new insights and learn something enriching .
thank you : )
Adult Child | LIPSTICK ?? & GAMING ?? YouTube @WeAreFiveSRWG | Positive Psychology Enthusiast | Recovery Ambassador | Spotify Podcaster | Leave No One Behind (2022) Hazelden Meditations | Military Veteran In Journalism
8 个月I'll have to go back to Day 1