Comprehensive Guide to Integrating Khalti Payment Gateway in Next.js for a Seamless E-Commerce Experience
Manoj Shrestha
MERN Stack Developer but Industry turned me into Next.js Developer | PostgreSQL | PrismaORM | ReactQuery | NextAuth/AuthJS
Learn how to seamlessly integrate the Khalti payment gateway into your Next.js-based e-commerce website. This detailed guide will take you step-by-step through setting up the front-end product listing, implementing the payment process, and handling success and failure responses.
Introduction
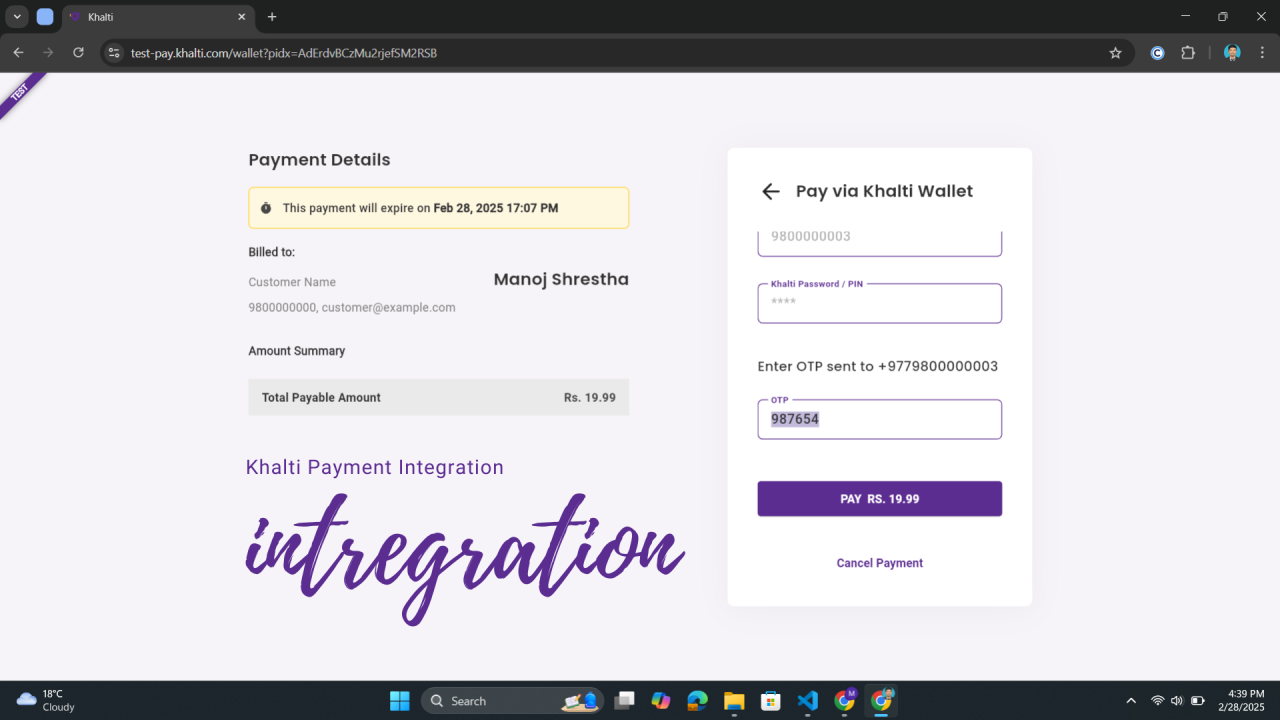
In today’s digital landscape, offering secure and convenient payment options is crucial for the success of any online business. In Nepal, Khalti is one of the most trusted payment gateways, allowing businesses to accept payments through various methods, such as digital wallets, debit/credit cards, and mobile payments.
This article provides a comprehensive, step-by-step guide on how to integrate Khalti's payment gateway with a Next.js-based e-commerce platform. Whether you're building a new e-commerce site or looking to enhance an existing one, this tutorial will help you integrate Khalti seamlessly into your project.
Step 1: Setting Up the Product List (Frontend)
Before diving into the payment integration, we first need to create a way for customers to browse products. For this, we’ll use a basic Next.js setup where we render a list of products. This will also include a payment button for each product.
First, we need to create a file that will serve as the home page and render the list of products.
import { products } from "@/data";  // Importing product data
import ProductList from "@/components/ProductList";  // Product list component

export default function Home() {
  return (
    <>
      <ProductList products={products} />
    </>
  );
}
This code uses the ProductList component to display all available products.
Step 2: Defining the Product List Component
We now need to define the ProductList component, which will accept an array of products and display them in a responsive grid. Each product will display its name, description, price, and stock availability. We'll also include the KhaltiPaymentButton that lets users initiate a payment for each product.
interface Product {
  id: number;
  name: string;
  description: string;
  price: number;
  stock: number;
}
interface ProductListProps {
  products: Product[];
}
function ProductList({ products }: ProductListProps) {
  return (
    <div className="grid grid-cols-1 sm:grid-cols-2 md:grid-cols-3 lg:grid-cols-4 gap-6 p-6">
      {Array.isArray(products) && products.map((product) => (
        <div key={product.id} className="border border-gray-200 rounded-lg shadow-md overflow-hidden hover:shadow-lg transition-shadow duration-300">
          <div className="p-5">
            <h3 className="text-lg font-semibold text-gray-100 mb-2">{product.name}</h3>
            <p className="text-gray-600 mb-1">{product.description}</p>
            <div className="flex justify-between items-center mt-4">
              <p className="text-xl font-bold text-indigo-600">Rs. {product.price.toFixed(2)}</p>
              <span className="text-sm bg-green-100 text-green-800 px-2 py-1 rounded">In Stock: {product.stock}</span>
            </div>
            <KhaltiPaymentButton product={product} />
          </div>
        </div>
      ))}
    </div>
  );
}
In this ProductList component:
Step 3: Implementing the Khalti Payment Button
The?KhaltiPaymentButton?initiates the payment process. When clicked, it requests that the server create a payment session and redirects the user to Khalti’s payment page.
Here is the code for the KhaltiPaymentButton component:
"use client";
import React, { useState } from 'react';
import axios from 'axios';

interface KhaltiPaymentButtonProps {
  product: {
    id: number;
    name: string;
    price: number;
  };
}

const KhaltiPaymentButton: React.FC<KhaltiPaymentButtonProps> = ({ product }) => {
  const [loading, setLoading] = useState(false);

  const handlePayment = async () => {
    try {
      setLoading(true);

      // Create a unique purchase order ID
      const purchase_order_id = `ORDER-${product.id}-${Date.now()}`;

      // Send payment details to the backend
      const response = await axios.post('/api/khalti-verify', {
        amount: Math.round(product.price * 100), // Convert price to paisa
        purchase_order_id,
        purchase_order_name: product.name,
        customer_info: {
          name: "Customer Name", // Replace with actual user data
          email: "[email protected]",
          phone: "9800000000"
        }
      });

      if (response.data.success && response.data.payment_url) {
        // Redirect to Khalti's payment page
        window.location.href = response.data.payment_url;
      } else {
        console.error("Failed to initiate payment");
      }
    } catch (error: Error | any) {
      console.error("Payment error:", error.response?.data || error.message);
      alert(`Payment initialization failed: ${error.message}`);
    } finally {
      setLoading(false);
    }
  };

  return (
    <button
      onClick={handlePayment}
      disabled={loading}
      className="w-full mt-4 bg-purple-600 text-white py-2 rounded-md hover:bg-purple-700 transition-colors flex items-center justify-center"
    >
      {loading ? 'Processing...' : 'Pay with Khalti'}
    </button>
  );
};

export default KhaltiPaymentButton;
Key Points:
Step 4: Backend API Route for Payment Initialization
Now, let’s define a backend API route in Next.js to handle payment initialization. This route will interact with Khalti’s API to create a payment session and generate a payment URL.
"use server";
import axios from "axios";
import { NextResponse, NextRequest } from "next/server";

export async function POST(req: NextRequest): Promise<NextResponse> {
    try {
        const bodyData = await req.json();
        const { amount, purchase_order_id, purchase_order_name, customer_info } = bodyData;

        const response = await axios.post(
            'https://dev.khalti.com/api/v2/epayment/initiate/',
            {
                return_url: 'https://localhost:3000/api/khalti-verify/', // Set your return URL here
                website_url: 'https://localhost:3000',
                amount,
                purchase_order_id,
                purchase_order_name,
                customer_info,
                merchant_username: "Merchant Name",  // Replace with actual merchant name
                merchant_extra: "Business Info"
            },
            {
                headers: {
                    Authorization: `Key ${process.env.NEXT_PUBLIC_KHALTI_LIVE_SECRET_KEY}`,
                    'Content-Type': 'application/json'
                }
            }
        );
        return NextResponse.json({
            success: true,
            payment_url: response.data.payment_url,
            pidx: response.data.pidx
        });
    } catch (error: Error | any) {
        return NextResponse.json({
            success: false,
            error: error.message,
        }, { status: 400 });
    }
}
This POST route:
Step 5: Verifying the Payment (Success and Failure Handling)
After the user completes the payment, Khalti will redirect them back to your site. You'll need to handle the verification of the payment status.
Create a handler for the GET request to verify the payment status:
export async function GET(req: NextRequest) {
  const url = new URL(req.url);
  const pidx = url.searchParams.get('pidx');

  if (!pidx) {
    return NextResponse.json({ success: false, message: "Missing payment information" });
  }

  try {
    const response = await axios.post(
      'https://dev.khalti.com/api/v2/epayment/lookup/',
      { pidx },
      {
        headers: {
          Authorization: `Key ${process.env.NEXT_PUBLIC_KHALTI_LIVE_SECRET_KEY}`,
          'Content-Type': 'application/json'
        }
      }
    );

    const paymentData = response.data;
    if (paymentData.status === 'Completed') {
      const search = url.searchParams.toString();
      return NextResponse.redirect(new URL(`/payment/success?${search}`, req.url));
    } else {
      return NextResponse.redirect(new URL(`/payment/failed?reason=${paymentData.status}`, req.url));
    }
  } catch (error: Error | any) {
    return NextResponse.redirect(new URL('/payment/failed?reason=verification-error', req.url));
  }
}
Key Points:
Step 6: Payment Success and Failure Pages
Payment Success Page:
"use client";
import React from 'react';
import { useSearchParams } from 'next/navigation';
import Link from 'next/link';

export default function PaymentSuccessPage() {
  const searchParams = useSearchParams();
  const txnId = searchParams.get('transaction_id');
  const orderId = searchParams.get('purchase_order_id');
  const amount = searchParams.get('amount');
  const username = searchParams.get('username');

  return (
    <div className="min-h-screen bg-gray-100 flex flex-col items-center justify-center p-4">
      <div className="bg-white rounded-lg shadow-lg p-8 max-w-md w-full">
        <h1 className="text-2xl font-bold text-center text-gray-800">Payment Successful!</h1>
        <p className="text-center text-gray-600 mb-3">Your payment has been successfully sent to {username}.</p>
        <div>
          <p>Order ID: {orderId}</p>
          <p>Transaction ID: {txnId}</p>
          <p>Amount: Rs. {amount}</p>
        </div>
      </div>
    </div>
  );
}
Payment Failure Page:
"use client";
import React from 'react';
import { useSearchParams } from 'next/navigation';
export default function PaymentFailedPage() {
const searchParams = useSearchParams();
const reason = searchParams.get('reason') || 'Unknown reason';
return ( Payment Failed Oops! Your payment could not be processed. Reason: {reason} Back to Home );
 }
Conclusion
Integrating the Khalti payment gateway with Next.js offers a seamless, secure, and user-friendly solution for e-commerce websites. By following the steps outlined in this guide, you can implement a complete payment flow that includes product listings, payment initiation, and success/failure handling. This approach ensures that your customers can easily pay for their purchases with Khalti’s trusted payment platform, all while providing a smooth user experience.
Feel free to share this article on LinkedIn or any other platform to help others integrate Khalti with Next.js!